What can be better than lemon-kissed blueberry dairy free ice cream? If you could make this without an ice cream maker! If you can't do cashews, I bet you could make this with an ice cream maker and omit the cashews. I have made similar combos without cashews. (I didn't come up with the wonderful lemon and blueberry inclusion. Go
here to see this great recipe). I would use coconut milk.
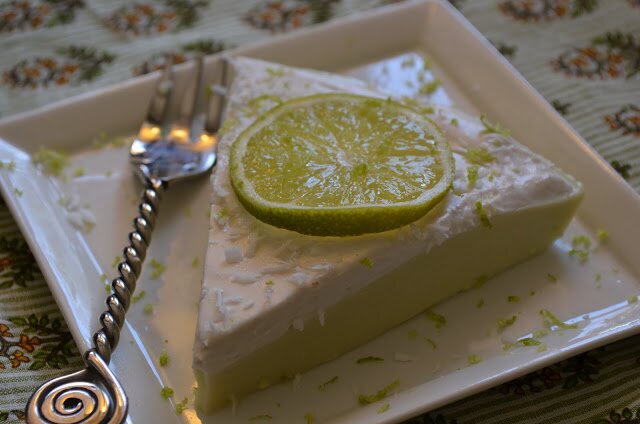
Lemon-Kissed Blueberry Ice Cream (no ice cream maker required!)
This ice cream is a great summer treat. Light and fruity, it offers a pleasant diversion from the heavier, cream-laden ice cream flavors. Top with a few more fresh berries for a lovely presentation.
3 cups (750 ml) fresh blueberries
2 Tbsp (30 ml) freshly squeezed lemon juice
1 Tbsp (15 ml) water
2/3 cup (110 g) raw cashews
2/3 cup (160 ml) unsweetened plain or vanilla almond or soy milk
1 can (12 oz or 400 ml) full-fat organic coconut milk (I use
Thai Kitchen)
1 ripe pear, cored (you can leave the skin on)
Either prepare your ice cream maker according to manufacturer’s directions; or place 10 silicone muffin cups in a muffin tin and set aside.
Place the blueberries, lemon juice and water in a small pot and bring to a simmer over medium heat. Lower heat to medium-low, cover the pot and cook until the mixture reduces to about 1-1/2 cups (360 ml), stirring frequently. It should be fairly thick with very little juice (if any) at the bottom of the pot. Remove from heat, stir in the stevia to taste and allow to cool.
Meanwhile, place remaining ingredients in a high-speed blender and blend until perfectly smooth and silky.
Add the cooled blueberry mixture to the blender and blend again until combined. (NOTE: to create a blueberry swirl through the ice cream, remove about 1/3 cup (80 ml) of the blueberry mixture before adding it to the blender and set aside. Otherwise, simply add all the of the blueberry mixture to the blender now.).
Regular (with an ice-cream maker) ice cream: chill the mixture if desired. Once cool, place the ice cream in an ice cream maker and follow manufacturer’s directions. For the blueberry swirl, add the reserved blueberry mixture during the final seconds of churning. Freeze according to manufacturer’s directions.
Without an ice-cream maker: Divide the mixture equally among the silicone muffin cups (store the reserved 1/3 cup cooked blueberries in the refrigerator for now, if using). Freeze for at least 4 hours or overnight. Once frozen, pop the hardened disks out of the cups and store in the freezer in ziploc bags until ready to use.
When ready to make ice cream, withdraw about one “muffin” per serving. Cut each into quarters and place the chunks in a food processor, then process until the mixture resembles crumbs. Continue to process until it comes together in a ball. Press down and pour a ring of the reserved blueberry mixture over the ice cream in the processor. Pulse 2-3 times, just to incorporate the “swirl” into the mixture, but not enough to blend. Scoop and serve. Total recipe makes 6-10 servings. Store frozen for up to 1 month.
Suitable for: dairy-free; egg-free; gluten-free; grain-free; sugar-free; low glycemic; Anti-candida stage 2 and beyond; vegan.