 |
| photo as noted from practical-stewardship.com
Ingredients
Instructions
|
Showing posts with label how to. Show all posts
Showing posts with label how to. Show all posts
Sunday, February 26, 2017
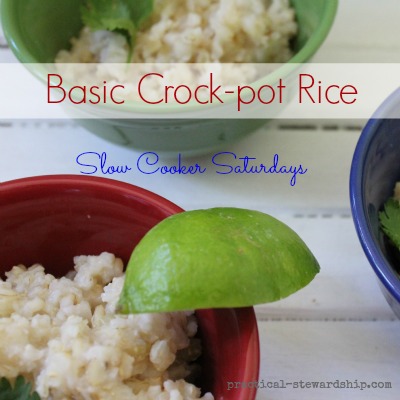
How to Make Rice in the Crockpot
Practical Stewardship explains the secrets to making rice in the crockpot. I love a crockpot. There's nothing like being able to throw in ingredients, walk away and let it do the work for you.
Tuesday, January 3, 2017
Ways to Make Social Gatherings Allergy-friendly
Bring your own bun. If it's a BBQ or inolves burgers, talking to them about getting one without seasoning and bringing your own bun is a good option.
Bring your own pasta. Another idea is to send them a recipe for spaghetti sauce such as this one and bring your own pasta.
At a potluck. Potlucks are perfect because all you have to do is bring your own dish and you know you will have something to eat. If you are really sensitive, dish up right away so that you know it doesn't have wheat (or other things) in it. I like to bring Thyme Chicken to potlucks.
Have people over to your house. This is the perfect way to share a meal with others. May I suggest, that unless you have gluten free baking that is unusually good, it might not be a good idea to bake and share gluten free stuff. Those gluten lovers would be on to you! I try to stick with things like this pesto salad that I can just make gluten free pasta and split the ingredients into two. Or I make something like this teriyaki chicken that is naturally gluten free.

Bring your own pizza to a pizza party. On more than one occasion we have been invited to a pizza party. My kids are dairy free, and I am gluten and dairy free so this is a big problem. Until I started BYOP. Bringing my own pizza. I just put it in foil, and bring it in a small cooler. Then I whip it out at pizza time. It's a little weird, but is nice because then you can "partake" without getting sick.
Ask if you can do a potluck and bring some food. If someone invites me to dinner, after thanking them profusely I bring the news of my food intolerances. One thing that I may do is suggest making it a potluck where I bring something that I can eat to share. This generally goes well. I have even brought over the bulk of dinner. This is something I like to bring: Pork with Grilled Apples.

Bring food just for you and talk to them about it. At certain social gatherings I have even talked to them before hand and just brought my own food. For example, coming over for thanksgiving and just bringing similar things that I can eat. It's a bit awkward, but works.
Give someone a recipe you can have that is naturally allergy-friendly. When I had a baby people graciously wanted to bring something over for my family.My friend had a good suggestion, which was to send out to people wanting to bring a meal 4 or 5 recipes that my family can eat (which don't have too unusual of ingredients). Some ideas are: porcupines, chili, thyme chicken (see above), ham soup and mexican haystacks.
Bring your own pasta. Another idea is to send them a recipe for spaghetti sauce such as this one and bring your own pasta.
At a potluck. Potlucks are perfect because all you have to do is bring your own dish and you know you will have something to eat. If you are really sensitive, dish up right away so that you know it doesn't have wheat (or other things) in it. I like to bring Thyme Chicken to potlucks.
Have people over to your house. This is the perfect way to share a meal with others. May I suggest, that unless you have gluten free baking that is unusually good, it might not be a good idea to bake and share gluten free stuff. Those gluten lovers would be on to you! I try to stick with things like this pesto salad that I can just make gluten free pasta and split the ingredients into two. Or I make something like this teriyaki chicken that is naturally gluten free.

Bring your own pizza to a pizza party. On more than one occasion we have been invited to a pizza party. My kids are dairy free, and I am gluten and dairy free so this is a big problem. Until I started BYOP. Bringing my own pizza. I just put it in foil, and bring it in a small cooler. Then I whip it out at pizza time. It's a little weird, but is nice because then you can "partake" without getting sick.
Ask if you can do a potluck and bring some food. If someone invites me to dinner, after thanking them profusely I bring the news of my food intolerances. One thing that I may do is suggest making it a potluck where I bring something that I can eat to share. This generally goes well. I have even brought over the bulk of dinner. This is something I like to bring: Pork with Grilled Apples.
Bring food just for you and talk to them about it. At certain social gatherings I have even talked to them before hand and just brought my own food. For example, coming over for thanksgiving and just bringing similar things that I can eat. It's a bit awkward, but works.
Give someone a recipe you can have that is naturally allergy-friendly. When I had a baby people graciously wanted to bring something over for my family.My friend had a good suggestion, which was to send out to people wanting to bring a meal 4 or 5 recipes that my family can eat (which don't have too unusual of ingredients). Some ideas are: porcupines, chili, thyme chicken (see above), ham soup and mexican haystacks.
Friday, October 14, 2016
Make Your Own Gluten and Dairy Free {Vegan} Pumpkin Spice Latte

Prep Time: 4 minutes
Cook time: 6 minutes
Makes 4-6 lattes
Ingredients:
3/4 cup canned pumpkin
3/4 cup sugar or a sweetener of your choice
1 tsp ginger
1/2 tsp nutmeg
1 and 1/2 tsps cinnamon
2 cups milk substitute (I use unsweetened rice milk)
1 shot of espresso (or you could use 3/4 cup coffee and 1 and 1/4 cup milk sub instead)

Directions:
Mix ingredients in a saucepan and cook over medium low heat until it's slightly darkened the sugar seems combined.
Add 2-4 TBS of mixture (depending on how strong you like it) to a tall mug with one shot of espresso and 2 cups of your milk substitute of choice. Heat in the microwave until warm (one to two minutes). You can top with coconut whipping cream and extra pumpkin spices. Put the leftover pumpkin mixture in the fridge and you can make another pumpkin latte in a heartbeat. I am posting this at Allergy-free Wednesday and Waste Not Want Not Wednesday.
Saturday, October 1, 2016
How Do You Begin Changing Your Diet?
1) Stock up on foods you CAN eat. There's nothing worse than going off foods and feeling like you are starving to death. I think the number one thing is to plan meals and have lots of food on hand that you can eat before you dive in. The preparation time will pay off. Always knowing you have something you can grab to eat, makes it way easier not to give in and order pizza. Buy, nuts, rice pasta, corn pasta, gf crackers, gf pretzels, gf chips, fruit, etc. Have some quick meals like Amy's GF,DF, SF mac and cheese ready. Go to my amazon store on the upper right hand corner to get ideas of things to start with. Vegan Nutribiotic (GF and SF free) protein powder is a great thing to have to start.This allergy friendly protein powder helps make an easy shake to help you get through any day, especially during an adjustment period.
2) Start by eating simple things that are naturally free of those foods. For example, chicken and rice. Or fish and baked potatoes. Having these sort of basic meals is a great way to start. If you are going to avoid gluten try a meal that is naturally gluten free.
3) Find blogs, and cookbooks that someone recommends or get good reviews on Amazon. I would suggest the cookbooks on my blog. The website: silvanaskitchen.com has recipes that are naturally gluten free, as well as ones that use special flours. www.nourshingmeals.com is another one of my favorites. When I started I had a cookbook that required something like 10 different gluten free flours. Every recipe had different flours to use. To start baking required quite a commitment because I needed to buy so many different flours. That's why I prefer, "Cooking for Isaiah" or "Gluten Free Baking Classics" (see side bar). They require only 3 types of flour. Period. Almost every recipe calls for it. So you buy those flours and you are set.
4) Try the Gluten free sampler here. This could be a great way for you to try products and see what you like. (warning: this turned out to not be quite what I had hoped.)
5) Go to a health food store and ask for help. I went to a health food store and told them about my problems. Someone basically held my hand, to help me find products I could eat. Through someone there, I learned that garbanzo flour is the closest in texture/etc to wheat flour. I also learned that spelt cannot necessarily be tolerated by those who are off of gluten. I went home with a basket full of goodies that I could eat.
5) Cook larger meals and have leftovers the next day for lunch. Or freeze one serving for a later day. That way you aren't cooking all of the time and have something ready to eat in a pinch.
6) Get Cecilias Marketplace Guide here. This manual that will help you find safe foods at any store. Once you know it's a good product you can keep buying it. Don't worry, you won't be walking around the supermarket with your nose stuck in this book forever. the edition I have includes foods that are mutually gluten, casein (dairy) and soy free. It isn't all inclusive, but the ones in there are verified to be safe.
7) Buy some flours, and start baking. Bake double batches so you have extra on hand. I would suggest not going too crazy in baking to start. You don't want to get burned out and overwhelmed. But baking double batches of things once or twice a week, can make a huge difference. It can also make you feel like you aren't baking all of the time. I take a muffin out when I'm ready for it.
8) Look at my substitutions (label on the right). Soon you can make any recipe and just substitute in what my substitutions say (or your favorites). At first it may be easiest to do recipes that don't require eggs, or breadcrumbs, or milk. But later you can add in some of these substitutions. Soon, you can cook almost any recipe by just switching out these things.
9) Get good cooking gadgets. A good food processor, blender, bread maker, ice cream maker, waffle maker, garlic press, food chopper, knife set and dishwasher are some possibilities. I find that I cook more now than I did before taking these things out of my diet. Truth be told, there aren't that many ready-made things I can eat, so I need to make a lot of food from scratch. By getting a few of those kitchen gadgets, it made my life that much easier. A quiet dishwasher was high on my list. Dish washing is one of my all time least favorite chores, but with a nice quiet dishwasher this makes me way more likely to cook. My old one sounded like the ocean roaring in my kitchen. It was so loud, I didn't want to turn it on most of the time.
10) This will get cheaper. After awhile you won't be trying "dud" products. You will know where to get "such and such" at a good price. It may not be inexpensive, but it won't break the bank like it does when you start. Go here to do gluten free (or allergen free) on a shoestring.
11) Keep in mind the food will taste different. I know someone who said he likes to try new foods. When going gluten free instead of thinking, "this will taste like an english muffin," he thinks, "this will be something totally new, and maybe I'll like it". If you aren't trying to find something identical to what you are "replacing" it can make a huge difference. For me, a huge part of changing my diet was letting go of my idea that food should taste the same as it always did. It will be different. It may even be delicious. Even if it's called an "english muffin", it may not be exactly the same. It's something totally new. This helps with disappointment and helps make the transition easier. It can be hard to do! Cheese substitutes were the hardest for me to let go of my ideal with.
12) Here are traveling tips with food allergies.
13) Here is how to go gluten (or allergen) free without losing your mind.
14) If you go to a potluck bring a main dish that you can eat. This way you are guaranteed to be able to eat something. If you go to a b-day party, bring your own ice cream, or cake. You can explain your intolerance and people usually are ok with it even if they may not totally understand.
15) Take heart, this will get easier! So much easier! At first you feel like you are climbing uphill with a ball and chain on your ankle, but before you know it, this will become normal. Pretty soon, these foods will be second nature to make. After awhile, all of this won't seem so bad.
16) Be encouraged. If you truly have a food intolerance it will be worth it. I heard once, "food is my medicine" from someone who had celiac disease. If it makes you feel that much better. It truly is like medicine. This transition will be worth it!
Saturday, July 16, 2016
How to Make Sun Dried Tomatoes
The Homestead Lady has this great tutorial on how to make your own sun dried tomatoes. I love sun dried tomatoes and our tomato plant is bursting right now.
 |
| photo from the Homestead Lady |
She says, "I have an Excalibur dehydrator with nine racks so I make sure to pick a big bunch of Borgheses because I use a lot of dehydrated tomatoes. I wash them off and get out a cutting board, knife and my dehydrator racks. Then I sit and slice those babies in half. I could really use any cherry/grape type tomato for this, fyi; you can see in the picture that I have Sungolds, yellow pear and even some green Mr. Stripey that were yummy but small this year. I’m so not picky about varieties most of the time – if it’s a tomatoes, I’ll eat it.
Then I put the slices close together, but not piled on top of each other and fill each rack. I have a high volume of product so I’m always running a full dehydrator; it you have less, use fewer racks and certainly a smaller (cheaper) unit. Drying time is totally dependent on what temp you set it to, how wet the product is and the ambient moisture around the unit. I live in Utah, so I’m blessed with dry air. I like my veggies to stay kind of close to raw so I set them between 115-135 degrees, depending on how much time I have; the lower the temperature, the longer it takes to dry them. Usually a batch of tomatoes takes a good 24 hours.
Dehydrated to Sun Dried Tomatoes
After they’re dried, I prepare my jars; as you can see, I reuse anything I have because they just need a lid to be useful. I use one to three cloves of garlic and a teaspoon of sea salt in each of my sun dried tomatoes jars.
I de-jacket the garlic and add naked cloves to my jar, then the salt and then as many dehydrated tomatoes as I can comfortably push into the jar – I don’t want to pack it so tightly that I can’t work the jar easily but I do want to preserve as many as possible. If you’re not going to refrigerate your jars, you’ll probably want to use dried garlic to safe guard against botulism – 1 clove equals about 1/4 tsp dried, minced garlic. I will say, though, that I typically steep my tomatoes and garlic on my counter at room temperature for about a week before I put them in the fridge. Do what feels comfortable to you. I’m always making tinctures and herbal oils and messing around with stuff that might bother some people. If it doesn’t seem right to you, don’t do it – simple as that.
Finally, I cover the tomatoes with a fine olive oil and screw on the cap. I can store these in a my fridge for about a year using fresh garlic or you can use dried garlic and put them in your cold storage room. My cold storage room isn’t as cold as I’d like, so I use my fridge and fresh garlic. One thing to keep in mind about using olive oil is that it doesn’t last as long as something like canola oil. Olive oil can get smelly and taste a bit off after as little as three months outside of the fridge. Honestly, these sun dried tomatoes are so good, they may not even last that long, but its something to keep in mind. The longer they steep in the oil, the stronger the salted garlic flavor; I could also add herbs like basil or rosemary, if the notion struck me. I learned this process from the book Preserving Food Without Freezing or Canning.
I use these all year, but especially all winter, long. May I just say that they are fantastic mixed into dinner bread or on top of homemade pizza or added to raw kale salad. Once you’re done with the tomatoes, use the amazingly flavorful oil in salads or stir frys. Dang, I’m hungry again! "
Tuesday, July 12, 2016
Gluten Free Tips for College or Home
These tips from Schar.com's blogger Brianna Wolin are perfect for the gluten-free person who is going to college, moving out of their parents house, or just starting with the gluten free diet in general. photo credit: Schar.com


1. Establish your apartment as a gluten-free safe haven.
College life is loaded with gluten—late night cheesy bread and beer on tap at every tailgate, just to name a couple. Every student can have gluten in every space on campus. Why not have one small space be entirely dedicated gluten-free, for a complete sense of safety? I don’t let anyone bring gluten into my apartment, which keeps every nook and cranny of my place 100% safe, and also allows my friends to come in and use anything in my apartment to cook a fun, gluten-free dinner!
2. Always have a well-stocked freezer.
There’s nothing like the feeling after a long day of classes, meetings, and homework that there isn’t anything ready for dinner. A freezer stocked with gluten-free bread products, pre-cooked proteins, and microwave meals always ensures a meal is ready to go, even with little energy or time left in the day.
3. Consider a produce delivery service
Without a car on campus, getting fresh groceries every week is an extraordinarily difficult task. With a biweekly delivery of a box produce, however, ensures that there are gluten-free staples in the fridge, even without a trip to the grocery store!
4. Have safe snacks in several backpack pockets.
Unfortunately, the experience of going to a birthday party as a kid where everyone had pizza and cake doesn’t end in college. As a celiac child, my mom always packed gluten-free pizza and a cupcake for me to bring with. Never assume that there will be a gluten-free option at club meetings, campus events, etc. More often than not, there isn’t. With a little snack in several pockets, you’ll never be caught off guard. My personal favorites are gluten-free chocolate chip cookies and little squares of Dove chocolate!
5. Seek out the gluten-free options on campus early.
Though there are very few celiac-safe, gluten-free options on the University of Michigan campus, when I first arrived several years ago, I immediately sought out every potential place to sit with friends, have a meeting with a professor, or run a board meeting for an organization. For me, that meant Starbucks, several frozen yogurt shops, and a few other coffee places. Though the list is short, having go-to places, even for coffee, is crucial for integrating yourself into campus life. However, inviting people into your gluten-free safe haven for snacks is always an option!
Friday, July 8, 2016
How to Make Allergy-friendly Food Without Losing Your Mind
Maybe that's just me, but when I first started I found the amount of cooking somewhat overwhelming. Over time these things have made allergy-friendly living way more do-able.


- Have food you can eat on hand. Always having something you can grab. . . whether it's in the freezer, canned or a snack, makes life way easier. I don't have a lot of ready-made things I can eat (or afford to eat all of the time) but if I have a few of them on hand it makes a big difference if I don't feel like cooking at some point. Some of my favorites are: Stagg's "Classic" chili, Amy's GF,DF mac and cheese, Nature's Hilights pizza crusts, Lundberg (Pico de Gallo) bean and rice chips and Ener-G pretzels.
- Menu plan. I know it can be a pain, but I find it makes a huge difference. If I know what is on the menu for the week, I can shop in one trip, let the meat thaw from my freezer ahead of time, etc and never have those last minute, "Ah! What do I make for dinner?" moments.
- Get some great kitchen supplies. Items like a food chopper, a food processor, a decent blender, a crockpot, an ice cream maker, etc, can make cooking that much easier and less time consuming. My motto is: why tediously chop food, or garlic by hand when you can use a food chopper, food processor or garlic press to make it effortless?
- After you cook a meal, freeze a serving or double the whole meal and freeze a family size portion. If you make a double batch of enchilada sauce or spaghetti sauce, then the next time you want a quick dinner, it definitely can happen. The single servings that I freeze, I can eat for lunch or take on a trip to a hotel that has only a microwave and fridge. Chicken can also be cut up, cooked and frozen to add to a meal. Hamburger can be cooked, and frozen in family size portions, so that it is ready to go for an easy meal as well.
- Eat left overs. I have learned to be grateful for leftovers. I make a little extra and often eat it for lunch the next day. If we have a bunch of leftovers we might even all pick our own lunch out of various ones on a Saturday. This helps limit cooking and keeps something ready to eat as well. If you have more leftovers than you feel like eating (I usually am interested in only one leftover meal of a particular dish) then remember to freeze it for another day.
- Make your own baking mixes. I make my own "mixes" to make my life easier and make myself less likely to buy it pre-made or pre-packaged. So one day I make up 5 mixes of all of the same recipe. For example, a muffin recipe. I put in all of the dry ingredients to each of the 5 bags. I label each with what it is, the cookbook name, and page number so it is easy to add the yeast or wet ingredients when I am ready to do it.
- Mix herbs in little snack bags. I can't have taco seasoning in the store bought packets, so sometimes I make my own up, and put it in snack bags so that when it comes time to make tacos, all I need to do is throw it in.
I am posting this on Allergy-free Wednesdays here. Check out the great tips and recipes!
Saturday, February 20, 2016
Everything You Need To Know About Stir-Frying
I love this graphic from Cooksmarts.com. It gives a perfect run down for making any kind of amazing stir fry! I would use coconut aminos or gluten-free soy sauce instead of regular soy sauce since it contains wheat. You can also use coconut sugar instead of brown sugar as it has a similar taste. You could make a months worth of meals with this graphic alone! You can leave off the nuts, peanuts or sesame! Maybe try sunflower seeds instead!
Wednesday, February 10, 2016
The Secrets of Rice Pasta

Note: If you keep track of how much time it takes for that brand of pasta, and write it down, the next time you buy that kind you can more easily set a timer and know it will be done. It really varies by pasta, and the directions are often deceiving!
Monday, January 18, 2016
How to Cook a Perfect Steak
BBC Good Food give us some of Gordon Ramsey's best tips on how to cook the perfect steak. I had been trying to perfect a juicy steak in the last year, and find it kind of fun. This has a lot of good tips to get you started! I like to serve mine with a bake potato and salad or oven roasted broccoli!
Their site says,
"Gordon Ramsay suggests using groundnut oil for cooking steaks – it has a mild flavour and can withstand very high temperatures without burning. Never use butter, unless you want to add a knob at the very end for a creamy finish.
The jury’s out when it comes to how you apply the oil. Some chefs like to oil the steak then add it to a hot dry pan, while others add a splash of oil directly to the pan. Once the oil starts separating, it’s hot enough to add the steak. Whichever method you use, the important thing is to get an even spread of oil.
Don’t be tempted to put your steak in early – if the oil is too cool, your meat could turn out greasy and under-browned.
Dressing your steak
 |
| photo from BBC Food |
Beef purists may prefer to take in the unadulterated rich flavour of a quality steak by adding nothing other than a few twists of salt and pepper. However, don’t season too early – salt will draw moisture from the meat. Gordon Ramsay suggests sprinkling black pepper and sea salt onto a plate, then pressing the meat into the seasoning moments before placing it into the pan.
You could try dry-spicing your steak with coriander seeds, or go really heavy on the cracked black pepper by adding half a teaspoon per steak.
Others like to enhance flavour and tenderise the meat with a marinade. Balsamic vinegar will reduce down to a sweet glaze, as will a coating of honey & mustard. You can add an Asian dimension to your beef with a miso or teriyaki marinade.
How do you like it?
 |
| photo from BBC Food |
Our cookery team have outlined what you can expect from each category of steak.
- Blue: Should still be a dark colour, almost purple, and just warm. It will feel spongy with no resistance.
- Rare: Dark red in colour with some juice flowing. It will feel soft and spongy with slight resistance.
- Medium-rare: A more pink colour with a little pink juice flowing. It will be a bit soft and spongy and slightly springy.
- Medium: Pale pink in the middle with hardly any juice flowing. It will feel firm and springy.
- Well-done: Only a trace of pink colour but not dry. It will feel spongy and soft and slightly springy.
Get cooking
It’s very important to consider the size and weight of your steak before calculating the cooking time. If you’re unsure, take advantage of the expert eye of your butcher who should be able to tell you how long you need to cook your meat.
We recommend the following cooking times for a 3.5cm thick fillet steak:
- Blue: About 1½ mins each side
- Rare: About 2¼ mins each side
- Medium-rare: About 3¼ mins each side
- Medium: About 4½ mins each side
We also recommend the following for a 2cm thick sirloin steak:
- Blue: About 1 min each side
- Rare: About 1½ mins per side
- Medium rare: About 2 mins per side
- Medium: About 2¼ mins per side
For a well-done steak, cook for about 4-5 minutes each side, depending on thickness.
Check your steak is cooked correctly
 |
| photo from BBC Food |
Use your fingers to prod the cooked steak – when rare it will feel soft, medium-rare will be lightly bouncy, and well-done will be much firmer.
Leave it to rest
A cooked steak should rest at room temperature for at least five minutes – it will stay warm for anything up to 10 minutes. Here, pure science comes into play – the fibres of the meat will reabsorb the free-running juices resulting in a moist and tender finish to your steak. "
Wednesday, January 13, 2016
{Gluten Free} Breading Ideas for Meats
One of my favorite blogs, Nourishing Meals (and the authors of a favorite cookbook) has these great ideas for breading meats. It is way more ideas than I am used to using. I love their fresh ideas. I have yet to try one of their recipes that I don't like.
Here is what she says:
I made sure my chicken breast slices were wet (with water) before adding these ingredients. This helps the flour adhere to the meat.
I made sure my chicken breast slices were wet (with water) before adding these ingredients. This helps the flour adhere to the meat.
 |
| photo from Nourishing Meals |
Other Ideas for Gluten-Free Breading:
- Polenta (coarsely ground cornmeal) ground in the food processor with your choice of dried herbs and salt
- Corn flour
- Sweet rice flour
- Brown rice flour
- Crushed potato chips (I have never used this but learned it from Shirley's GFE site)
- Crushed Brown Rice Crispy Cereal (I learned this today from Alison's Sure Food Living site - in the comment section!)
- Crushed corn flakes
- Bread crumbs made from dried out GF bread slices (pulse dried bread slices in a food processor to get crumbs)
- Coconut flour (or coconut flour mixed with shredded coconut)
There are a few methods for breading. Some chefs like to toss the food (meat, fish, tofu, veggie) in a starch such as arrowroot powder and then do an egg wash, then, finally toss to coat in the breading of choice.
I have done it this way with great results (an egg-free version): Toss your food item in a thick non-dairy milk (or dairy if you prefer), then toss in an egg-free wash made up of a semi-thick mixture of water and arrowroot powder, and then finally toss in the breading of your choice.
To sum it all up:
1. Choose your breading and pulse it in the food processor with salt, pepper, and your choice of herbs and spices. Set aside in a large bowl.
2. Dip your food into a dry starch or thick milk.
3. Then dip your food into an egg wash or arrowroot (egg-free) wash.
4. Finally, dip your food into the breading of your choice.
5. If using the stove, have your pan hot and ready (wait to add the oil until you are ready). I use grapeseed oil or coconut oil for cooking at higher temperatures.
6. If baking, make sure your oven is preheated and your pan is ready.
Saturday, December 19, 2015
How to Make Your Own Seed (or Nut) Butter
I know many of my readers don't eat nuts, however this is a great way to make seed butters, too! You could make a pumpkin seed butter or a sunbutter! Yum!
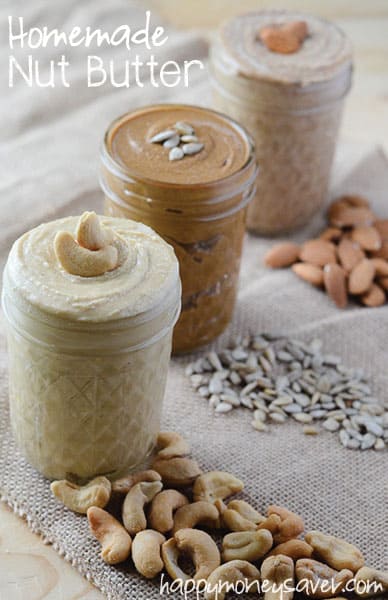 |
| photo from Happy Money Savers |
I love Happy Money Savers tutorial on how to make Nut or Seed Butters! Having a great blender really helps with this. I have a Ninja which is middle of the road. I think I may have to invest in a more hard core one to make butter like this. We eat enough sunbutter, it just might be worth it!
 |
| photo from Happy Money Savers |
How To Make Homemade Nut/Seed Butters
Author: Karrie
Prep time:
Total time:
Serves: 8-16 ounces
How to make nut butter out of pretty much any nut - it's all a matter of patience, time, and flavorings!
Ingredients
- 2-4 cups raw or toasted nuts or seeds
- 1-3 tablespoons neutral-flavored oil (coconut, light olive oil)
- 1-4 tablespoons sweetener (honey, maple syrup, agave nectar, cane sugar, etc.)
- Fine sea salt
- Adds-ins, such as vanilla bean, cocoa powder, spices (cinnamon, ginger, nutmeg, etc.), herbs (chili powder, cumin, garam masala, etc.) (optional)
Instructions
- Decide whether or not you want to toast your nuts/seeds first. If yes, toast them in a single layer on a baking sheet for 10-15 minutes in a 325 degree F oven. While still slightly warm, add the nuts/seeds to the bowl of a high-powered blender (fitted with the four-blade attachment) or food processor. (If you have a smaller processor, reduce the amount as needed. There needs to be enough room for the nuts to move to convert to butter, but also enough nuts for the blades to actually reach.)
- Process on high speed for about 10 minutes, making sure to scrape the sides of the bowl frequently. Depending on the type of nut or seed, you may want to add a bit of oil to help the process at the 10 minute mark, or when the ground nuts begin to form a dry paste.
- Continue to blend (and scrape!) until it becomes smooth and creamy, and moves easily around the bowl, another 5-10 minutes, adding more oil as necessary. The butter will be very warm, almost hot, to the touch as it processes - this is normal due to the friction created.
- Add any desired salt, sweetener, and/or add-ins at the very end of the processing time.
Wednesday, June 3, 2015
Make Your Own {Gluten Free} Taco Bowls from Corn Tortillas
I love this super super cool idea from My Fridge Food of how to make your own taco bowls. I like to use Mission Corn Tortillas which now say that they are gluten free. This is so easy and such a great idea, it's one of those things that you wonder why you didn't come up with this!
 |
| photo from My Fridge Food |
Description
just improvise the rest :)
Details
| Cooking Time: | 10 | |
| Recipes Makes: | 3 | |
| Calories: | 52 | |
| Carbs: | 11 | |
| Fat: | 1 | |
| Protein: | 1 |
Ingredients Related Tips
Tortillas
Directions
1. Preheat the oven to 375.
2. Sprinkle each tortilla lightly with water and stack them on a plate. Cover the top with another plate turned upside down and microwave the tortillas for 1 minute or until warm. Turn two 12 cup muffin pans upside down. Mist each side of a tortilla lightly with cooking spray and center it in the space between 4 muffin cups, creating a bowl. Repeat with the 5 remaining tortillas, forming 3 bowls on each tin (as pictured above). Bake in the oven for 8-10 minutes.
2. Sprinkle each tortilla lightly with water and stack them on a plate. Cover the top with another plate turned upside down and microwave the tortillas for 1 minute or until warm. Turn two 12 cup muffin pans upside down. Mist each side of a tortilla lightly with cooking spray and center it in the space between 4 muffin cups, creating a bowl. Repeat with the 5 remaining tortillas, forming 3 bowls on each tin (as pictured above). Bake in the oven for 8-10 minutes.
Thursday, February 26, 2015
How to Cook Chicken and Broth in the Crock Pot

1. Buy a whole chicken. Remove wrapper and put in large crockpot. You can add, a bay leaf, garlic, salt and any other herbs you wish. You could also add carrots, celery or onion. I sometimes even just sprinkle the chicken with olive oil and salt alone. Then turn it on for 6 hours on low. Check it with an instant read thermometer. If it is 165F when inserted in the thigh away from the bone it should be done. This will make sure it is done, yet keep it from being too dry which chicken in the crockpot is famous for.
2. Remove chicken from bone. Leave skin and bones in crockpot. Fill with water. Put on high for an hour or so. Let cool for a little while. Strain through a strainer. I put mine in a container in the fridge with saran wrap over it, with just a little opening for it to finish cooling. In the morning I skim off the fat. Then I freeze it in quart sized bags. Boom! You are done!
 |
| I rubbed the chicken with 1 tsp salt, 1/2 tsp McCormick's Grill Seasoning, 2 tsp garlic powder, 1 tsp parsley and a drizzle of olive oil. |
This makes 3 or 4 quarts of chicken broth, and a ton of chicken. I freeze the chicken for enchiladas, or soups. Or, like tonight, I serve it with rice and asparagus for a simple and easy dinner. Since soy and gluten are often added to ready-made chicken, or chicken broth. . . this is a simple way to ensure it's both allergy friendly and inexpensive. I am posting this at Allergy-free Wednesdays.
Friday, February 20, 2015
How Do You Cook Pasta in the Microwave?
| A friend was on a trip recently, and was telling me how her hotel didn't have a full kitchen but did have a microwave. She asked if I had ever cooked pasta in the microwave before. I have not, but found this great tutorial. With gluten free pasta I would add in a little oil. I would also be careful about over cooking the noodles and check it more often than she suggests. Better to check when it is underdone, and put it in a little longer than have a big pile of rice mush from overdone pasta. Another thing I would do is go for Tinkyada, Jovial, or a GFree pasta that has mixed grains. For example, corn and rice, or quinoa and rice. These pastas are often way more forgiving than just a rice pasta. However, Tinkyada and Jovial are in my experience the most forgiving of the pure rice ones. Has anyone every tried this? I'd love to hear. All you need is some tomato sauce and this could make a fantastic quick hotel meal. This is on my to do list. For directions go here to Tablespoon.com. .  |
| photo from tablespoon.com |
Friday, November 21, 2014
Super Easy Sauerkraut
Whole New Mom has this super easy way to add pro-biotics (beneficial bacteria) to your diet. Sauerkraut! I love how easy it is.
 |
| photo as noted from Whole New Mom |
Ingredients
cabbage
salt (Please use a “non grocery store” salt like Real Salt or Himalayan Salt)
bay leaves (optional)
caraway seeds (optional)
cabbage
salt (Please use a “non grocery store” salt like Real Salt or Himalayan Salt)
bay leaves (optional)
caraway seeds (optional)
Method
1. Slice cabbage thinly. This can be done with a knife, a mandolin slicer, or the slicing attachment on a food processor.
1. Slice cabbage thinly. This can be done with a knife, a mandolin slicer, or the slicing attachment on a food processor.
2. For every kilo of cabbage, mix with 20g of salt, or, for every pound of cabbage, mix with 9g of salt, about 2 tsp of finely ground salt.
3. Toss cabbage and salt with your hands so it is well distributed and let rest, about one hour.
4. Knead/massage the cabbage with your hands, to encourage more juice to come out. Add optional bay leaves (about 1 per lb) and/or caraway seeds (about 1 tsp per lb).
5. Pack tightly into a jar. I usually grab a handful, drop it into the jar, and then use my fist to push it down well. You can also use a pounder, or something like a thick stick.
6. Once all the cabbage is in, make sure there is enough liquid to cover the cabbage by about an inch. Weigh the cabbage down, as discussed above.
7. Put a lid on the jar. Be aware that you will need to occasionally let the C02 out that will accumulate.
8. Set it out of direct sunlight and let sit for at least 4-6 weeks. 4 weeks is the minimum required for the full cycle of probiotics to develop. Exact fermenting times will depend on ambient temperature and your tastes. The sauerkraut pictured has sat for a month, and it could use a little more time.
9. Put in the fridge to slow fermentation. Enjoy probiotic goodness!
Thursday, October 30, 2014
A Few Gluten-free Baking Tips
The Frugal Farm Wife has these great gluten-free baking tips to share. I thought I'd pass them along. Thank you, Frugal Farm Wife!
- Bake bread at a lower temperature. Gluten-free bread batter tends to be very moist and needs a lot longer baking time than wheat bread. In order to accomplish baking a loaf that’s done in the middle, but not too brown on the outside, lower your oven temperature by 25 degrees, and lengthen the baking time.
- When in doubt, Use gum. I’ll be the first one to shout “You don’t need gum in everything!” as a money saving tactic. Still, if there’s any doubt, use the gum. It can save you a lot of dispointment and wasted ingredients. I typically use guar gum, because it’s cheaper, or you can use xanthan gum. The point is that since gluten-free flours aren’t sticky like wheat is, you need to replace it with something. Generally, you’ll use about 1 teaspoon of gum per cup of flour for bread, and 1/2 teaspoon per cup for everything else.
 |
| photo from the Frugal Farm Wife |
- Use a blend of flours. Of course, I highly recommend using a rice flour blendas a money saving strategy, but blending in some buckwheat, corn, and/or millet is really nice for flavor - especially in things like bread that don’t have a lot of other flavor contributors.
- Go mini. While you can make large loaves of gluten-free bread, it’s much, much easier to get awesome results with small things. So think mini loaves, cupcakes, and such.
- Increase baking powder. Once again, without gluten, flour isn’t very sticky, which makes it hard to trap the gasses caused by leavening agents, making your baked goods rise. You can increase baking powder by up to 25%. (I haven’t had very good results with increasing baking soda, but maybe that’s just me…)
- Add extra eggs to things like pancakes for extra moisture. Pancakes and waffles are really easy to make gluten-free, but the moisture of an extra egg is really nice!
- Add some protein! Gluten is a protein, which gives baked goods structure. You can combat the lack of gluten by adding some plain gelatin. This is much the same as adding gum, and I know some folks use gelatin instead of gum, but personally, I haven’t had great results doing that.
As you gain experinece using these general principals, and get a feel for how various batters and mixtures should look, gluten-free baking becomes second nature and you’ll find that you can tweak recipes to your liking, and even convert wheat recipes to gluten-free, all with amazing results. In fact, I think you’ll find the world of wheat-free food easy to love!
What are your best tips for successful gluten-free baking?
Subscribe to:
Posts (Atom)